
Warning: This post is very photo heavy, but hopefully it will give you clear instructions on how to make your own blooms. Please drop me a line if would like any more info. :)
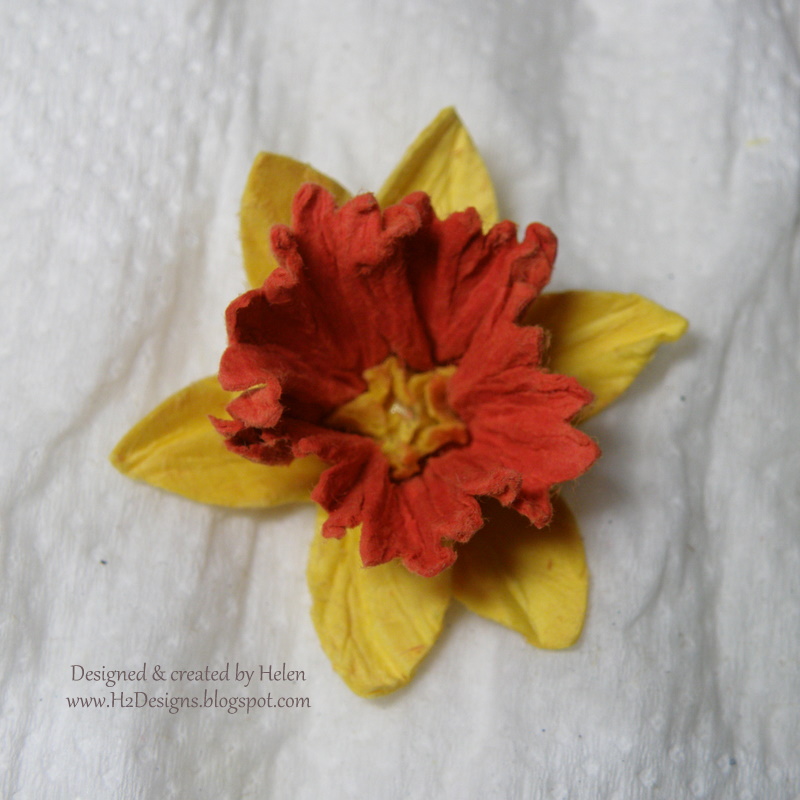
Here is a new version of the daffodils, with 6 petals (rather than 5):-

They are very 3D:-

Here is what you need:-
- 2 x 5 Petal Flower punchies (Daffodil Delight)
- 1 x 1.3/4" Scallop Circle punchie (Tangerine Tango)
- 1 x small six point flower punchie from Boho Blossoms punch (Daffodil Delight)
- 1 x Brad
- Piercing Tool
- Spray misting Bottle (alcohol or water)
- Adhesive
- Scrap of thin paper (photocopy or notebook paper is great)
- A few sheets of paper towel

First thing you need to do is pierce a hole in the centre of each punched piece. Take the two five petal pieces & trim away two petals, shaping your cutting out & around from the centre hole like this:-

Take your scalloped circle & attach it to the corner of your scrap paper:-

Using the scrap paper as a "handle", maneouvre the scallop circle back into the punch, lining up the dips in the punch with the centres of the scallops in the punched shape like this:-

Punch, & you will end up with this shape:-

Layer all the punched pieces onto your brad, starting with the small six petal flower, then the scalloped circle, then the two 3 petal pieces you created. It will look like this from the top:-

& look like this from the bottom:-

Next, with your flower sitting over the paper towel, give it a good misting with the water/alcohol. Using your fingers, scrunch up the first layer (you may need to spray the underside of the top layer to make it more pliable):-

Give the scallop circle layer a good misting & scrunch this up & around the brad:-

Mist the 3 petal sections, front & back, & scrunch these up around the brad. At this point, I gently roll the whole flower between my thumb & forefinger to compact it together:-

Once you are happy that your flower is well scrunched, you start gently opening up the layers, starting with the pointy petals:-

You can gently wiggle & scrunch these petals if you need to, to get the 6 petals sitting evenly.
Next, open up the scallop circle layer:-
Place the handle of your piercing tool into the centre of the daffodil:-

Pinch the scallop circle tightly up around the piercing tool to form the trumpet of the daffodil:-

You can use the point of your piercing tool to adjust the small inner petals of the daffodil if you wish. Leave your flower to dry or blast with a hairdryer. Here is the completed daffodil:-

When you want to attach the daffodil to your project, slide the handle of your piercing tool back into the centre of your daffodil, straighten the prongs on the brad, & then poke the brad through your project. Re-open the prongs on the brad.
Enjoy!
Daffodil Components
Cardstock: Daffodil Delight, Tangerine Tango
Hardware: Gold brad,
Tools: 5 Petal Punch, 1.3/4" Scallop Circle Punch, Boho Blossoms Punch, Piercing Tool
Other: Misting Alcohol/Water, Paper Towel, Scrap Paper, Adhesive